If you want to enjoy the delicious roe of sea urchins, you must clean it thoroughly to enjoy its highly valued delicacy. You should know that proper cleaning is necessary to prevent contamination and allergic reaction.
Sea urchins who like to sit on the seabed and feed on plankton, algal communities, and other vegetables often accumulate dirt and debris on their spines and bodies. Therefore, in this article, I will not only tell you how to clean sea urchins but also the safety precautions that you need to keep in mind because some spines can contain toxins that may irritate your skin.
Table of Contents
Safety Precautions
Before you jump directly into the sea urchin’s cleaning process, you must also prioritize your personal safety. When you are rinsing or washing sea urchins’ spines/ outer shells, you must wear protective gloves on your hand to avoid any injury.
You must follow proper handling techniques, like holding the sea urchins gently to minimize the risk of accidents. In addition to this, you must also be aware of the poisonous sea urchin species and avoid those.
Even though sea urchins can be toxic, you may not encounter any toxic ones sourced directly from a reputable supplier or purchased from a local seafood market.
However, it is still best to be on the safe side by knowing those species that are known to possess venomous spines and may cause this comfort or allergic reactions if you come into contact with them.
Below I mention a proper table on poisonous sea urchin species to help you identify and exercise caution when handling them.
| Species | Common Name | Venom Effects |
| Tripneustes gratilla | Collector Urchin | Intense pain, swelling, numbness, and weakness |
| Echinothrix calamaris | Black Sea Urchin | Similar effects as Collector Urchin |
| Toxopneustes pileolus | Flower Urchin | Strong pain, respiratory distress, dizziness |
Consider Reading My Recent Post On: Are Black Sea Urchins Poisonous?
5 Tools & Equipment Needed
Now, coming to the point of how to clean sea urchins, you will need to gather a few sensual tools and equipment. Below I’m mentioning five tours and equipment you should have for the proper cleansing process of sea urchins and avoiding contamination.
- Get a sturdy glove that can protect your hand from the spine while washing or handling it.
- Always use a small knife or scissors to trim the sea urchins’ spines. It would help if you never did it using your finger, as it can cause accidental punctures or pinching.
- To find the sea urchins and clean the roe properly, you must have a bowl of water.
- Even after removing the outer exoskeleton of the sea urchins properly, you may also encounter remaining spines. To remove that, you will need to use tweezers or forceps.
- Lastly, get a good sturdy cutting board that provides a stable surface for working further.
Also Read: Are All Sea Urchins Edible
How To Clean Sea Urchins
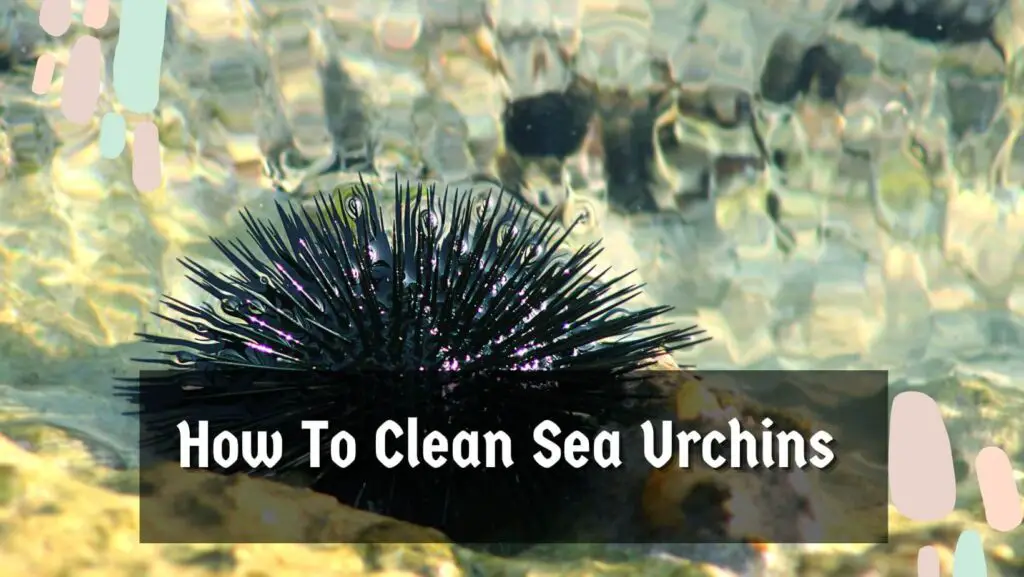
To help you clean the sea urchins properly, I’m mentioning four easy steps you need to follow below.
Step 1: Removing the spines
As I told you earlier, you must gently pick and hold the sea urchins with a gloved hand to avoid getting pricked. Even nontoxic sea urchins can cause allergic reactions in people with compromised immune systems if pricked. If pricker, you may experience Sea Urchin Sting Symptoms.
In addition, you need to use a small knife or scissors to trim off the spines of the sea urchins carefully. Start from the top and work your way down to do that effectively. Also, make sure that you remove the remaining spines delicately using forceps or tweezers. If you have done all this properly, you must move to the next step.
Step 2: Opening the shell
Now, it’s time to open up the shell of the sea urchins effectively to avoid ruining roe, also called Uni, known for its delicacy. To do it effectively, you should first locate the mouth of the sea urchins, which should be on the underside.
Insert a knife or scissors, and carefully cut along the shell. Make sure to create a small opening only, then gradually widen it. Ensure you are not damaging the internal part while doing so.
Step 3: Extracting the roe
Once you have properly opened up the sea urchin’s protective shell, you will encounter its internal organs. Rinsd the sea urchins under running water to remove any Dirt and debris accumulated under them to avoid contamination.
Once you have rinsed it properly, take a spoon and gently scoop out the bright orange part of its internal organ, known as roe/uni. Depending upon the species, roe, also known as Uni, can be bright Orange or yellow. This part is highly sought after and popular among seafood enthusiasts. I scooped out the roe, placed it in a separate ball, and ensured it remained intact.
Step 4: Cleaning the roe
Lastly, you will need to clean the role effectively. To do that:
- Use the water bowl and fill it halfway.
- Submerge the roe and gently swirl it while allowing sand or debris to separate from this delicate piece.
- Make sure you are replacing the water and repeating this process until the water becomes crystal clear, indicating the roe is perfectly clean and ready to use.
Step 5: Using It
Once you’ve cleaned the roe, you can use it in many culinary recipes. People eat the Uni, a roe of sea urchins RAW, and enjoy its buttery texture. You should know that the people also like to experiment with their dishes using sea urchin’ roe to elevate its culinary value.
In many parts of the world, people use sea urchins roe in different cuisines and cultures. I have even shared an in-depth article on different sea urchins recipes posted on this website for you to check on. All those recipes are not only very tasty but also nutritionally beneficial.
Popular Articles or Topics
5 Tips for Cleaning Sea Urchins
If you want to enhance your sea urchin cleaning experience more, consider the tips below.
- Always make sure to purchase or choose fresh urchins with an intact shell and no cracks or damages, as it ensures the roe quality too.
- It would help if you always exercised caution when handling sea urchins to avoid injury from their spines.
- Today, you can also find many kinds of specialized sea urchins opener, like uni opener, which is effective in the shell remover process. Thus, it will make the cleaning process of sea urchins easier and safer for you.
- If there are any leftovers, you should always store the cleaned sea urchin roe in a sealed container inside the refrigerator to maintain its quality texture and freshness. If you need to learn how to preserve them effectively, consider checking our guide on preserving sea urchins effectively.
- Never mind experimenting with sea urchins through various recipes to explore their versatility and enjoy their unique taste in a wide range of dishes.
Conclusion
To enjoy sea urchins’ buttery and briny texture, thoroughly clean them. You should note that cleaning sea urchins is necessary before you savor their delicious roe. You must follow all step-by-step processes effectively and take necessary safety precautions when extracting the priced sea urchin roe.
Make sure to choose the fresh one with vibrant color and no cracks on its outer shell to ensure raw quality. If you keep all these in mind, you can confidently embark on your sea urchin’s cleaning journey and explore its culinary possibilities.
Ensure you always wear protective gear like gloves when handling them or water boots to protect your feet from the sea urchins’ spines underwater. I’ve given you all the information you wanted to know on how to clean sea urchins, and if you find this article helpful and informative, consider sharing it.
You can make thousands learn to clean sea urchins with precautions to ensure the roe remains intact during extraction. Do check our other helpful guides, shared or sea urchin recipes, and preservations. See you in the next post, till then, take care and goodbye.